You’re dreaming big and you’re excited about designing and outfitting your greenhouse! Perhaps, you’ve already been exploring options for maximizing your greenhouse growing space to ensure it’s cost-effective? Part-1 of “How to Maximize Your Greenhouse” addresses pros and cons of some popular greenhouse design types.
If you already have an existing greenhouse, feel free to skip this first section and go to Part-2 “How to Maximize Your Greenhouse: Interior Design”. Designing and outfitting the interior of your greenhouse to maximize growing space is a key step that requires careful thought and planning ‒ this will be covered in Part-2 of this blog. Wherever you are in your journey, we aim to inspire you with some useful tips to help you along your greenhouse growing adventure.
If you haven’t already purchased your greenhouse, you’ve come to the right place to learn how to maximize greenhouse space by weighing-in on some of the various types of greenhouse kits available in today’s marketplace. By now you may have discovered many prefab greenhouse design choices on your own, and you just want to do a side-by-side comparison, to decide which design best suits your needs and budget ‒ and, also, ensure that your choice meets with local zoning and building requirements.
What’s the best design to maximize your greenhouse?
People often ask, ‘what’s the best shape to maximize my greenhouse’? The short answer would be ‒ one that allows maximum sunlight, optimal ventilation in summer and the least amount of heat-loss in winter ‒ a structure that’s strong enough to withstand Nature’s extremes, year-after-year.
Let’s jump right in and explore some basic greenhouse designs ‒ and, some of the pros and cons of each shape. We’d love to introduce you to the benefits of portable, free-standing geodesic dome greenhouses as the most efficient and strongest structure known to man. No matter what you decide, we hope this blog will help you in your purchasing decision.
Regardless of the style and size of your proposed greenhouse, planning is key ‒ before launching full-steam ahead, you’ll want to put some thought into asking the right questions for positive outcomes ‒ For example, ask yourself…
- What is the intended purpose and function of the greenhouse?
- What are some of my up-front costs and my overall budget?
- Are there any zoning restrictions, building codes, permits and time-frames to be considered?
- What is the optimal location, and will future expansion become necessary?
- Is it cheaper to build or buy a prefab kit?
- How long does it take to build? How long does it take to put up a prefab greenhouse?
- Is the structure airtight?
- Regardless of the type of structure, insulation and ventilation are essential considerations. Will the greenhouse incur high heating and cooling costs?
- Plumbing for Utilities Water electric
Basic Greenhouse Designs — Pros and Cons
First, let’s go over a few basic greenhouse shapes and some of the pros and cons of each design. Depending on the size and complexity, most greenhouse kits can be erected quickly – however, there’s a lot of pre-planning that needs to happen to get to that point.
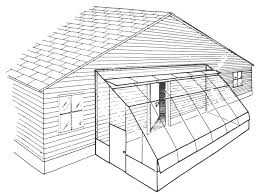
Lean-to Greenhouses:
Typically, attached to a home or other long-wall structure, some homeowners enjoy the convenience of stepping outside their door into a sunlit indoor garden. Lean-to greenhouses have a single-slope roof, a front wall and (most-of-the-time) two-gable ends. They can be covered by any transparent material ‒ such as, glass, polycarbonate panels or film.
Pros & Cons of Lean-to Greenhouses
Accessibility is the greatest benefit ‒ especially if you live in an area that’s extremely cold and covered by snow in the winter months. If properly located on or near a south-facing wall, you can harness the sun’s heat during the day, however, you will still need supplemental heating at night. Utilities are conveniently located nearby, allowing you to make some quick connections, without having to dig utility trenches.
A lean-to greenhouse isn’t always cost-effective to build for the following reasons:
Your local building codes will need to be considered and this could incur unexpected expenses, such as, engineering blueprints and supports. Because it’s considered part of your existing structure, you’ll need to build a good foundation. The point of attachment is a consideration ‒ height and pitch may need to be adjusted, as well.
You’re limited to the orientation of the structure you’ll be attaching to. Unless you’re prepared to add supplemental lighting, a Northern exposure isn’t the most desirable location.
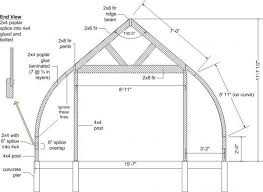
Gothic Arch Greenhouses:
One of the more popular designs, the gothic arch greenhouse comes in many sizes to accommodate anywhere from small backyards to huge commercial greenhouses. They feature walls that are preformed to fit over the frame and create a pointed roof; thus, reducing the overall material construction cost. Transparent walls and roof are typically constructed of polycarbonate panels or film covers, as a less-expensive option.
Pros & Cons of Gothic Arch Greenhouses
The simple and efficient gothic design allows for water and snow runoff. With proper airtight construction, they can conserve heat during winter.
In non-commercial sizes, you’ll need to plan your interior design well to compensate for lack of head-room. Storage space is restricted, and you may need to consider other storage options.
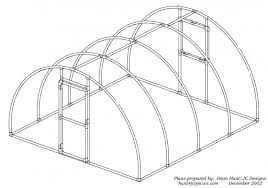
Quonset Greenhouses or Hoop-houses:
Quonset-style hoop-houses can be constructed from steel, aluminum or pvc. Curved arches and cross-members, called purlins, frame the support for transparent greenhouse tunnel covers. 4 or 6-mil single or double-wall poly-film tunnels are most often attached along the base of side-walls using wiggle-wire locks.
Pros & Cons of Quonset & Hoop Houses
Cost-effective and widely used by the military; as well as, home gardeners and commercial growers, quonset-huts are best-known for their ability to deflect high winds and allow for water and snow run-off. The quonset-hut kit is portable and rapidly deployable for use in varied terrains and climates throughout the world. Construction is simple, quick and straightforward.
Frames rely on purlins (cross-members) and end walls for structural support. The frames need to be well-anchored. You’ll need to plan your interior design well to compensate for lack of head-room along the side-walls. They can be expensive to heat and cool.
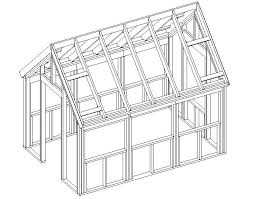
Conventional Post-n-Rafter Greenhouse
The attractive conventional design of the post and rafter greenhouse kit with its aluminum framing system, gable roofing and see-thru acrylic covering panels will certainly enhance any garden. For home gardeners who wish to enjoy the benefits of a backyard greenhouse, yet, want something that’s affordable and easy to install, home improvement centers offer inexpensive DIY kits.
Pros & Cons of a Post-n-Rafter Greenhouse
Good sunlight, air-circulation and space are among the perks of this design. The supporting rafter lends strength to this design and there are claims that post-n-rafter greenhouses are among the strongest.
While the rafter support strengthens the roof, it’s also top-heavy. The frame requires footing; thereby, increasing construction costs. During hurricanes and other extremes of Nature, a modern geodesic greenhouse design is likely to remain standing, while the post-n-rafter greenhouse may not fare so well.
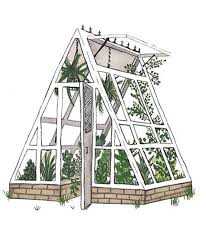
A-frame
There was a day when A-frame and Post and rafter greenhouses were quite common. Now, with all the prefab kits on the market, this is no longer the case. A ready-made A-frame consists of a simple triangular greenhouse that can be framed from lumber or constructed from a number of light-weight materials. While A-frame kits are still common, why would an A-frame be your first choice? You decide.
Pros & Cons of an A-frame Greenhouse
The key advantage of this design is rain and snow run-off. When cost-savings is a determining factor, light-weight A-frame kits can be readily purchased online and at home improvement centers . They come in a range of affordable prices and sizes that can be easily assembled by DIY home gardeners who just need minimal work space to pot or start their seedlings.
The narrow side walls limit an A-frame’s functionality to potting benches, creative use of hanging pots or centrally located vertical trellises. Air circulation isn’t optimal and supplementary venting should be considered.
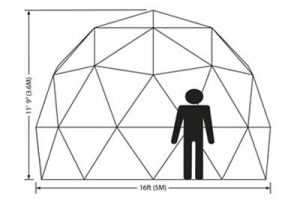
Geodesic Dome Greenhouse
We saved the best for last to give you the opportunity to compare greenhouse designs and weigh your options. Geodesic Domes are composed of inter-connected triangles that give them unparalleled structural strength. Buckminster ‘Bucky’ Fuller, father of the modern geodesic dome, demonstrated the difference in strength between a rectangle and a triangle by applying pressure to both structures. The triangle proved to be twice as strong and remained rigid while the unstable rectangle collapsed.
The American Institute of Architects calls the geodesic dome “the strongest, lightest and most efficient means of enclosing space known to man.”
Pros & Cons of a Geodesic Dome Greenhouse
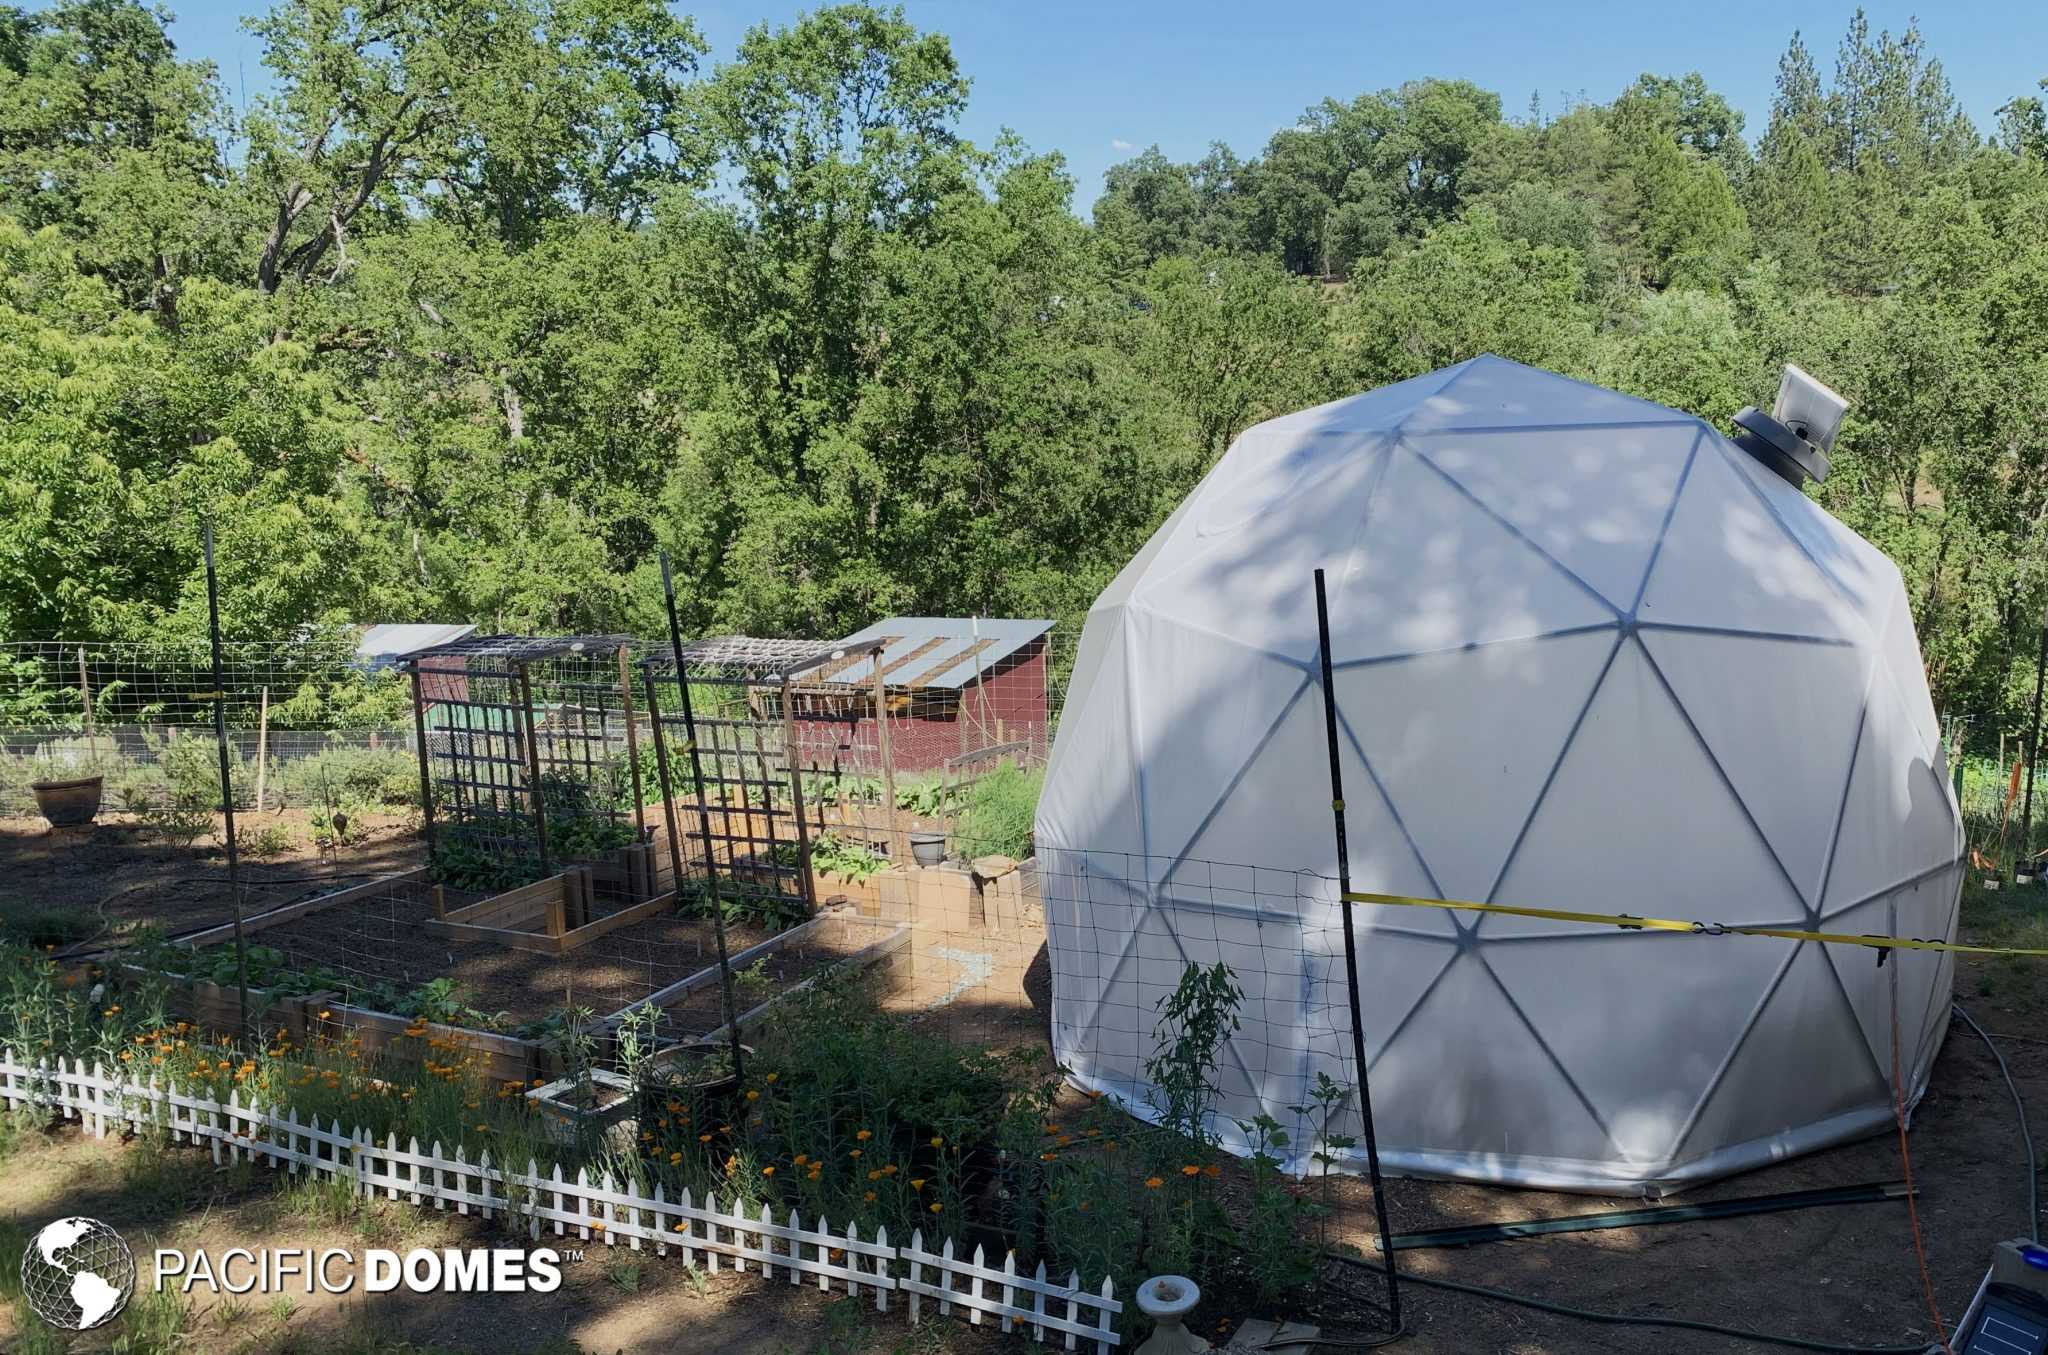
Our Greenhouse Domes withstand hurricane force winds and heavy snow loads. Inspired by the geometry of nature, the energy efficient design encloses the greatest amount of space with the least amount of materials. Its decreased surface area requires less building materials. The square-foot cost of a prefab kit is less than conventional building methods.
Domes make great all-season greenhouses. A dome’s unobstructed circular shape sheds rain and snow from all sides. One of the primary benefits that geodesic dome structures offer is an energy-efficient extended growing season in climates that are less than moderate, such as arctic regions and hot, windy deserts.
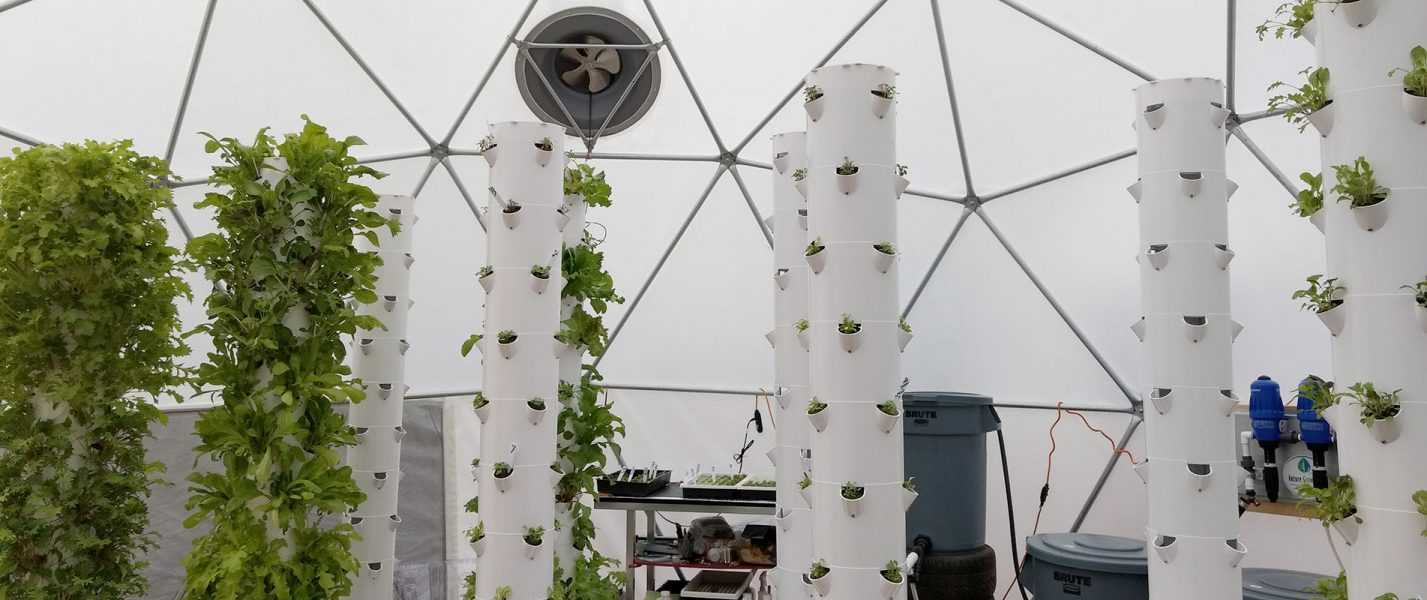
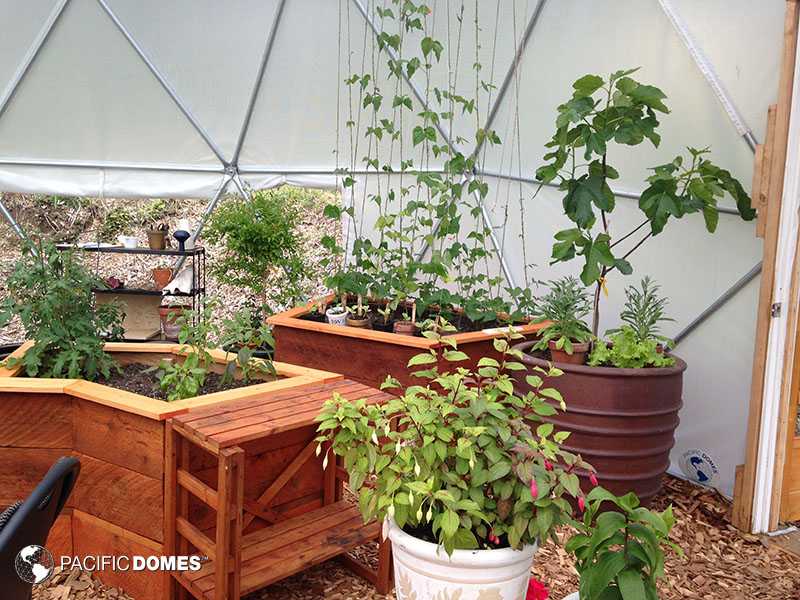
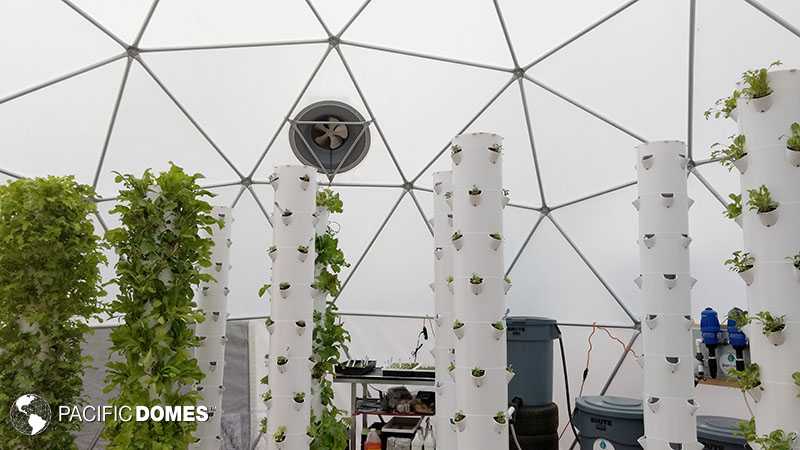
The spaciousness of the greenhouse dome’s interior structure offers limitless design possibilities from raised bed gardens to vertical growing towers. Its circular design encloses the greatest volume of interior space with the least amount of surface area.
The main downside to a geodesic-engineered greenhouse is its initial cost. That said, the quality, longevity, energy-efficiency and ample growing space makes the long-term investment worth the up-front investment.
Another possible disadvantage might be in obtaining a building permit in areas that are being exposed to geodesic dome construction for the first time. The good news is that this obstacle can be overcome when armed with the right ammunition ‒ a good set of building plans and engineering blueprints will go a long-way in getting approval from even the most conservative building departments. And, it wouldn’t hurt to mention that, The American Institute of Architects calls the geodesic dome “the strongest, lightest and most efficient means of enclosing space known to man.”
In Summary… What’s the best shape for a Greenhouse?
Hands down, a free-standing geodesic dome is the best greenhouse shape and here’s additional reasons why you would want to consider purchasing one…
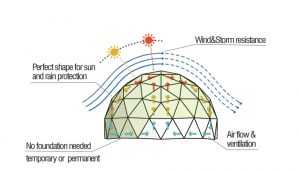
Energy-efficient Design:
- Exposure to cold in winter and heat in summer is decreased, due to less surface area per unit of volume.
- The concave interior creates a natural airflow, allowing hot or cool air to flow evenly throughout the dome with the help of return air-ducts.
- Extreme wind turbulence is lessened because winds contributing to heat loss flow evenly around the dome.
- It acts like a giant downward reflector that concentrates interior heat, preventing radiant heat loss.
- Dome studies, comparing same-size traditional structures, have shown a 30% energy savings.
Read More… How to Maximize Your Greenhouse Part-2