Thermo-Shield® Insulative Paint
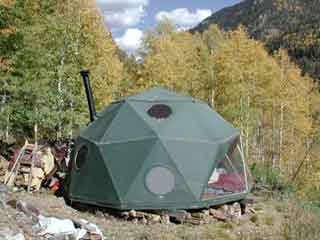
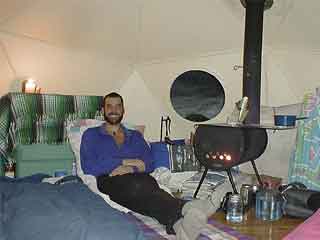
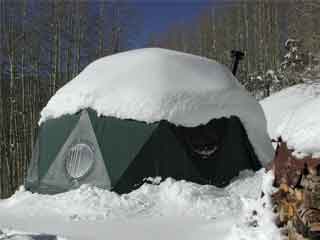
Thermo-Shield® insulative paint camouflages this green 16′ Hemisphere Dome, at 9,200 feet in the Colorado Rockies. White Thermoshield sprayed on the inside, reflects the wood heat back into the dome.
Advantages Of Thermo-Shield®
- Excellent insulative and weather-resistant properties
- Extends the life of any fabric
- Protects against ultraviolet light
- Waterproofing lasts 5 years with a good coat
- Fire-resistant
- Mildew-resistant
- Moisture can escape but cannot get in
- Non-toxic in liquid and cured state
- Cuts utility use by 1/3 when used on interior
- Long-lasting – no sign of deterioration
Thermo-Shield® Application Instructions
You will need:
- An appropriate amount of Thermo-Shield® for your size dome
- A tall stepladder (interior use), extension ladder exterior use) and/or scaffolding (interior/exterior)
- Non-stick masking tape and thin plastic sheeting (enough to mask your bay window). An airless sprayer, with 2500 psi that pumps one-gallon per minute and has an atomizing pressure fan spread of 60 degrees, with a nozzle with a tip orifice of 0.031 inches. *Please note: sprayers with these specifications are not available from all rental companies. It may be necessary to hire a professional with the appropriate equipment. Tell them that Thermo-Shield® is an elastomeric paint and inform them of these sprayer requirements. Acceptable equipment includes; Binks Super Hornet, Graco 433 or larger. *Brushes or rollers will also work, but will not be as even for light transmission. We do not recommend rolling or brushing on Thermo-Shield® because you will see uneven strokes when light shines through the dome skin.
Application:
- Apply Thermo-Shield® paint on a dry and preferably sunny day, 50° F or warmer. It is preferable to paint your dome while it is clean and new. If your dome is dirty, clean it using a power nozzle and/or a mild soap solution and a scrub brush. Remove all mildew. Clean the window pockets well. Allow fabric to dry thoroughly before applying Thermo-Shield®.
- Tape off the bay window with plastic sheeting. Use tape that will peel off easily. Remove the round windows, cover them with plastic sheeting, and reinsert.
- Close all zippers. Make sure that no zippers or Velcro are exposed to paint.
- Remove ALL screens and filters from the sprayer and the nozzle. The ceramic bubbles in Thermo-Shield® are a key component of the paint, and may get caught in fine filters and clog the sprayer.
- Prime pump with water before attempting to spray Thermo-Shield® Exterior Wall Coats.
- Practice your spray stroke testing the consistency of the sprayer on a piece of cardboard or scrap fabric.
- Apply thin, even coats, allowing each coat to dry to the touch before you apply the next coat, one to two hours. To assure adequate and uniform coverage, spray all coats in the same direction, do not cross spray to avoid showing undulations and other small imperfections in the walls.
- To paint the roof, open one of the corners of the roof. Put a ladder inside the dome below the open corner. Stand on the ladder with your upper body outside the dome. Paint as much of the roof as you can reach. Repeat through an adjacent corner until the whole roof is painted. Zip up the roof immediately after painting. Do not remove the roof to paint it with Thermo-Shield®. The paint will shrink the fabric as it dries, making it very difficult to put the roof back on.
- Remove round windows. Separate the round window frames with toothpicks. Apply several thin coats inside the window frame, especially on the bottom where the drain hole is. This protects the fabric from any dirt that collects inside the window casing.
- Flip up the bottom of your dome and apply several thin coats to both sides of the bottom hem of your dome skin. This will protect the fabric from dirt.
- If Thermo-Shield® gets on the vinyl window remove with a wet cloth. If it is dry, remove it with alcohol or Goof Off.
- Thermo-Shield® will quickly dry to touch in warm weather but will take a couple days to fully cure.
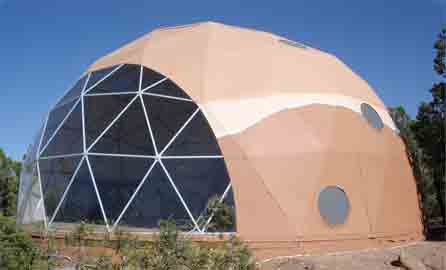
Thermo-Shield® paint is recommended in areas with extreme UV. It will reflect 99% of UV off the dome’ surface, keeping the dome cooler and extending the life of the fabric.
Tips to Safeguard and Prevent Window Heat Buildup
To safeguard a geodesic dome’s clear Bay Window and windows from excessive UV exposure, various effective alternatives can be explored, including the use of Thermo-Shield® Clear Coat. Orienting the bay window away from the sun, or attaching a thermal curtain will prevent heat build up throughout the day.
Applying a specialized UV-blocking film directly onto the window surface offers reliable protection by filtering harmful rays while maintaining visibility and light transmission. Alternatively, the use of tinted or UV-resistant transparent materials can enhance the window’s durability and longevity.
Additionally, the installation of solar shades on the exterior can efficiently manage heat and glare, promoting a comfortable interior environment. Another practical option involves creating an overhang or awning that extends beyond the Bay Window to shield it from direct sunlight during peak hours. For added versatility, a retractable awning system can be considered, allowing adjustable UV exposure control based on weather conditions.
Moreover, natural shading solutions, such as strategically placed trees or tall shrubs, provide eco-friendly protection while enhancing the dome’s surroundings. These alternative measures ensure the Bay Window’s longevity for many years, while contributing to the dome’s overall sustainability and aesthetic appeal.
Disclaimer: Thermo-Shield® will change the esthetics of your dome. Pacific Domes is not responsible for outcomes.